Tampilkan postingan dengan label SGY Tips and Tricks. Tampilkan semua postingan

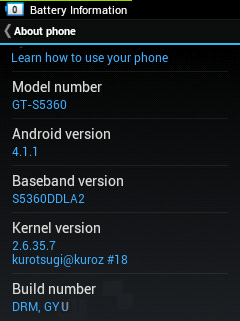
[Tricks] Change Your Build Number!!! [Root Required]

Posted by Unknown Senin, 05 November 2012 0 komentar
Here's a tutorial on how to change your SGY's build number to whatever you like!

Caution!: Don it on your own risk! It is advised to backup your rom before trying it just to be safe...

Your device needs to be rooted for doing this. First install "root explorer" from the app store and open the app. Next go to the system folder and press and hold "build.prop". After that press open with and open it with text editor. Now change the "ro.build.display.id=[your current build number]". Just change your current build number to whatever you like and save the file..

Now do the same thing but this time edit the build.prop inside system>framework.

Reboot

And you are Done!!!


Baca Selengkapnya ....

[TUTORIALS] Video Tutorials

Posted by Unknown Sabtu, 06 Oktober 2012 0 komentar
I'v tried my best to say and show all that i could here.
Any other requests are welcome.


Taking a BACKUP


Flashing back STOCK ROM via Odin


Flashing Merruk 

( i know i put it before )


LIKE THE VIDEO AND SUBSCRIBE! THANKS! 


Baca Selengkapnya ....

[APP][ROOT] Zip signer!

Posted by Unknown 0 komentar
Here is an App for signing Zip, Apk onboard your Android devices. Results are also automatically zip-aligned. Choice of keys: media, platform, shared, testkey -- or use auto-key selection modes.
Similar to jarsigner and signapk, this app can be used to sign update zip files, APK, or JAR files using one of the four built-in certificates.
This app runs without root privileges, but you'll most likely need root to do something with the results. 
Doing some moddifications to your apk or have to add something to a flashable zip file? you will need to sign it and this is the most easiest way to do it.
select the zipped up file from your directory, SIGN! 


Baca Selengkapnya ....

Increase your Internal Memory with Link2sd

Posted by Unknown Jumat, 25 Mei 2012 0 komentar

..Hi..This is a tutorial for increasing your internal memory with a link2sd app..

Link2SD moves apk + dex + lib files of the application to the second partition and creates symbolic links in the original locations on internal storage. 
First advantage is that it can free up more space from the internal storage compared to native apps2sd method because it moves the dex file as well.

The second advantage of Link2Sd over native apps2sd is that by creating symlinks you get Android assume these apps are installed into the internal memory, though in fact all the files are located on the SD. 
Therefore you can link all applicatios to SD card; widgets, services, live wallpapers etc., all of them will work without any problem from SD card.

The third advantage is that, even when you mount the SD card to your PC your linked apps are all still live and working!
Because Android unmounts the first FAT partition to share files with your computer but the second partition remains mounted. Link2SD allows you to run all of your "SD apps" even when mounted to your computer as a disk drive.

And, disadvantage is that, obviously, it requires root privilige and a second partition on your SD card. 
It's not working "out-of-the-box" as native apps2sd, you need to root your device and create a second partition on your SD card yourself.

Requirements:
-Windows computer
-Rooted SGY
-2nd partition on SD card (see step 1 below)
-Link2sd app (market or APK) *NOTE:market download is preferable because it is more updated*

Step 1:
1. Download minitool partition wizard home edition on your computer HERE
2. Connect your SD to the computer (via card reader or simply usb cable connected to your phone)
3. Make a folder on your computer and back up your entire SD card's main partition to it including hidden files and folders. (Remember if you do this right you won't have to lose your card's contents, unlike the recovery method.) *NOTE:Make sure that Show Hidden Files and Folders is ON so you can see some of the hidden folders present on an android system's SD card*
4. Open minitool partition wizard
5. Look for your SD card along the bottom and identify your FAT32 Partition *NOTE:be careful on choosing drives.you must choose correctly or you may partition your hard drive*

6. Right click on it and choose "Delete" then right click it again and click on "Create"
THEN


7. Change the create as: to Primary and change the File System to: Fat32 Use the down arrow in the middle field "Partition Size:" to change the value and consequently the value of the "Free Space After: field as well until you have created around 1027 MB of free space. *NOTE: DO NOT create free space before the first primary FAT32 partition!!! If you do discard changes and start over!*

8. Click Ok.
9. Identify the new unallocated space on the drive map.

10. Right click on it and choose "Create"

11. When you get the warning about the partition not being able to be used in Windows click "Yes" to continue
12. Choose Ext2, Ext3 or Ext4 for partition type based on whether your kernel supports Ext4. If it does choose it! If you don't know choose Ext2 to be safe. I would avoid Ext3 unless you have to. 2 or 4 are preferred 
*NOTE: You cannot resize an Ext partition after you make it. You can only move it around so choose your size wisely! I find a GB to be plenty and I have 150+ linked apps with 360 MB free on SD card partition 2 but you can have up to 2 GB.*
13. Make sure it is a primary not a logical partition

14. Name it if you want.
15. Click "OK" to continue
16. Click the BIG "Apply" button in the top left of the window (see the lower left side of the window if it is correct)

17. Choose "Yes" to continue from the pop up
18. Let it do it's work
*Step 1 complete*

Step 2: (I don't have screen captures yet :P )
1. Eject and place your SD card back into your phone
2. Boot up your phone
3. Install Link2SD
4. Run it
5. On first run it will ask you the type of partition your second SD card partition is. Choose Ext2 or Ext4 depending on which you made it.
6. Follow the directions to reboot your phone

Congratulations! Link2SD is now working on your phone!

When you click the menu button in Link2SD and choose "Storage Info" you should see three memory spaces. Internal, SD Card, and SD Card 2nd Part.

At this point I recommend you Menu click and go to Settings and choose "Autolink" to automatically link programs (.APK), dalvik cache files (.DEX) and library files (libs) to your SD Card 2'nd partition when a new program is installed.

Troubleshooting:

*If you have issues with your primary SD card partition not working right or perhaps you decided to wipe the whole card and create them both/or all three from scratch, remember that this FAT32 partition 1 has to be set ACTIVE and all partitions have to be primary not logical.

*If you cannot mount Ext2 or Ext4 make the second partition FAT32. It will work for all Wildfire S Models and all ROM's. Try the others first as they are preferred for performance and stability.

*If you don't have a card reader it's been reported that you can use your phone in hard drive mode to achieve the same thing, followed by a reboot but I have heard many cases where this causes troubles so I personally don't recommend it but hey. You gotta do what you gotta do.

*Some users are reporting with MarvelC's that they needed to use Ext3 so I have updated the tutorial to reflect this.

*If you don't immediately see a change in internal memory after linking apps relax. It will show up. Sometimes it just is a little delayed.


If you have questions, ask at our facebook page: http://www.facebook.com/sgalaxyy
Baca Selengkapnya ....

(only custom rom) !!how to get 15 mb to 25 mb free space of internal memory !!!

Posted by Unknown Minggu, 06 Mei 2012 0 komentar

okay this is it for getting free space  !!! and definatley not for noobs !!!

requirements
1. custom rom !!!
2.user should know how to remove crap system apps from system ( bloatware )
3.titanium backup pro

lets go ahead

open tt backup then press menu soft key for options u will see as above and then choose clean up dalvik cache !!!
then see ur system rom freee space mine is 70 mb ( as i removed all holy shit frm ma phone!!) urs may be different therefore for eg lets asume ur custom rom has 40 mb free space !!! okay rmeember 4o mb in ur mind and now press menu and this time choose integrate sys dalvik cache and tt backup will show u some no lets take it show 20 mb !!! so press ok to integtrate as 20 mb is less than 40 mb of free space !!! if ur freee spce is less for ex lets take 13 mb than u cant integrate as 2omb free space is needed !!! so u have remove bloatware frm ur system rom for that u check ma older post ! after removing crap u can do ma above steps !!! remember free space should be more than integtrateble memory


now check ur internal memory u will be suprised !!!!!


now how to integrate apps to system memory to save internal memory !!!


ok choose tab backup/and restore  ( see above pic) u will seee many appps !!!


to teach u i take ex of adobe flash player !!!
hold and press on appp u will see like this ( below pic )


then do a force close app ..... wait for sec 


then scroll down and u will see more options 


now select convert to system app !!! 


yo u r done ur app is in system rom tahts it !! now u can cinvert any app to system app 
but i noteced some app dont work properly after integrating to rom so for that just do a data wipe for taht respective app so it will now work


guys as i m not well so i cant clear ur doubts  so plz ask each other to clear doubts 

hope u guys understood wat i said 

if not then u r

n
o
o
!!!!!!


thats  all can i say!!! 


take care gud bye !!!!
luv ya

rachit

Baca Selengkapnya ....

V6 SUPER CHARGER SCRIPT!!!

Posted by Unknown Senin, 30 April 2012 0 komentar

V6 SUPER CHARGER SCRIPT !!!!!!

|
ALL CREDITS GOES TO   Zeppelinrox  (HE IS THE MAN BEHIND THIS FROM XDA)
THIS MAKE UR FONE AS FAST AS HELL SO ITS UR WISH TO GO FOR IT :)
REQUIREMENTS 1.ROOTED PHONE
                          2.BUSY BOX 1.18.2
                          3SCRIPT MANAGER 
                          4.V6 SUPER SCRIPT PDF
   GUYS THIS WORKS ON ALL ROM BUT NOT ON CUSTOM KERNAL SO IF SOMEONE HAS OVERCLOCKED HIS FONE THEN DO NOT TRY THIS BECAUSE IT DOES NOT WORK ON CUSTOM KERNAL (SOMETIMES IT WORKS :)) 
    
SO U NEED TO DOWNLOAD THESE 
    1 BUSY BOX INSTALLER    http://www.mediafire.com/download.php?66cwkv6hvj1m1b2
     2.SCRIPT MANAGER   http://www.mediafire.com/download.php?6ndli5l3q90qan2

     3.V6 SUPERCHARGER SCRIPT LINK COPY THIS TO UR SD CARD NOT IN ANY FOLDER 

Benefits of V6 Super Charger


  • It's a Complete Memory Management Fix to make your Phone Fast and Supper Snappy with better Multitasking!!!
  • No Launcher Redraws, faster than ever, multitasking is better... why?*Because it works with the lowmemorykiller and letting it work the way it's meant to work.
  • Also, because of the rearrangement, it works the same on all roms!
Steps to Install


1) First we are going to Install BusyBox V1.18.2... Open Busybox Installer and follow the below steps...

* * 2.1) This is the First screen when you open Busybox Installer... Now Tap the Down arrow key to select Busybox V1.18.2...

*

* * 2.2) Once you installed Busybox V1.18.2, you will see this*confirmation*message...


3) Now we are going to Run V6 Super Charger Script... Follow the below steps carefully and*accurately...

* * 3.1) Now open Script Manager ... Since this is the first time we are launching Script Manager... Allow 'Browse As Root' option...


* *3.2) Now Scroll down and select 'V6_SuperCharger_for_Android-Update9_RC6.9.sh' pdf file...*


* * 3.3)*A popup window will appear. On this window, select the "Fav" and "SU" buttons near the top (adding to favorites makes it easier to access later), then click "Run" in the top left...


* 3.4)*Now Text will start scrolling, you can scroll up at any time if you missed something. Script will do a bunch of tests to make sure you've got busybox and all that, your phone should pass fine. When asked to choose a scroll speed, choose 'Fast' by entering '1'...


* *3.5) Now in the next step select 'local.prop'...


* * 3.6) In the Next Step Select 'No'


* * 3.7)*You should now see the 'Driver's Console' a list of options numbered 1-30 and below that, various information on what's going on with your phone about SuperCharger....* * * * ** At the Driver's Console, you will need to pick one of the options listed under 512 HP (5, 6, or 7). Choosing 5 means more apps can run in the background, but the performance benefits will not be great... Choosing 7 will have the greatest performance benefits, but you may end up with a lot of apps being closed behind your back... If you're not sure which one you should pick, Choose 6. This is the best option for most people... BUT I CHOOSE 7 HEHEHE


* *3.8) Whichever the option you choose, It will ask you to 'SuperClean & Restart'... And you must do... It will Wipe your Dalvik Cache...


* *3.9)*After restart, open Script Manager and launch the V6 script again (if you added it to your favorites, once in Script Manager, click Menu Button > Favorites). Now in Driver Console Select option '13' which is 'OOM Grouping Fixes + BulletProof Launcher'... And give 'Yes' to install BulletProof launcher...


* * 3.10) Now back in Driver Console optoins, Select '20' Which is 'Nitrolag Nullifier'... Then Give 'Yes' to Drop all the caches...


* *3.11) Then again back in Driver Console, Select '18' which is 'Engine Flush'...


* * 3.12) Then back to Driver Console, Select '29' which is 'Super Clean & Restart'...


4) When you *finished* all the above steps...**You should notice a considerably faster startup time and a much snappier launcher. Lets verify everything was installed correctly by launching the script one more time...

5)*When you get to Driver's Console, look at the area below the options, you should see the following messages (you'll see others too, but these are the important ones)
  • Launcher is BULLETPROOF! i.e. SUPERCHARGED!
  • OOM Grouping Fixes ARE in effect!
  • Current values MATCH Prior SuperCharge!
  • Nitro Lag Nullifier is Installed!

6) If you see Everything there... Thats it, You successfully installed the V6 Script... Enjoy the Performance of your Device...  
 ANY DOUBTS JUST COMMENT IN FB :)))) PICS R TAKEN FROM XDA CREDITS TO emjimadhu

Baca Selengkapnya ....
Trik SEO Terbaru support Online Shop Baju Wanita - Original design by Bamz | Copyright of android populer.